Envision
QUICK START GUIDE
In this Guide
CONNECTING TO iCUE
To use Envision, you must first download iCUE.
https://www.scufgaming.com/downloads
CONNECTING TO iCUE:
Please note, before using the controller, you will need to download and install the Envision software on the device that the controller will be used on.
To download & install the Envision software, please open iCUE & plug your controller into your device via USB-C cable. iCUE will detect the controller and automatically download & install the software. It is recommended to restart your PC after the software has been installed.
iCUE:
Take your Envision customization even further with Corsair’s iCUE software on Windows. The iCUE software enables dynamic RGB lighting control, controller remapping, and the ability to tune your thumbsticks and triggers.
In addition, iCUE allows macro programing, sync lighting effects with other Corsair devices, and exclusive iCUE integrations with select games that sync your controller’s lighting with scenes in the game, providing a more immersive experience.
Meet Envision
Built to perform and give you the advantage no matter what you play. Get more out of your game with more control and sharper reactions.

- View Button
- Menu Button
- Start Button
- Mechanical Action Buttons
- Interchangeable Thumbsticks
- Interchangeable Anti-Friction Rings
- Removable Mechanical D-Pad
- G Keys
- RGB Lighting Strip
- 3.5mm Jack Port
- Removable Faceplate
- Remappable Side Action Buttons (SAX)
- Bumpers (LB & RB)
- USB-C Port
- Triggers (LT & RT)
- Instant Trigger Switch (Envision Pro only)
- Reset Button
- Profile Button
- Wired/Wireless Switch (Envision Pro only)
- Battery Indicator (Envision Pro only)
- Mute Indicator
- Slipstream Dongle (Envision Pro only)
- Remappable Paddles
- High-Performance Grip (Envision Pro only)
- USB-C to USB-A adapter
Charging
To charge Envision Pro, use the included USB-C cable and connect it to your computer while it is on or in rest mode. When charging is complete, the light bar will stop blinking green.
The Envision Pro controller comes equipped with a Power LED to indicate battery life and when the controller is charging. Please refer to the table below for Power LED color statuses and their meanings.
Power Status
Displays on start-up, when plugging in, and when un-plugging, or from changing between wired and wireless modes.
| STATUS | POWER LED INDICATION |
| Battery Charging | Pulse Green |
| Battery Critical – Recharge Required | Rapid Blink Red |
| Battery Low – Recharge Soon | Blink Red |
| Battery Medium | Blink Amber |
| Battery High | Blink Green |
| Battery Charged | Solid Green |
Please note that the non-Pro Envision’s Power LED Indicator will always show a Solid Green bar when in use.

Connectivity
Before using the controller, you will need to download and install the Envision software on the device that the controller will be used on.
To download & install the Envision software, please open iCUE & plug your controller into your device via USB-C cable. iCUE will detect the controller and automatically download & install the software. It is recommended to restart your PC after the software has been installed.
https://www.scufgaming.com/downloads
For Wired Play with Envision: Use the included USB-C cable and connect your controller to your computer.
For Wireless Play with Envision Pro: Insert the included wireless USB dongle into your computer. Flip the switch on the back of Envision Pro to wireless mode. Press the start button to power on the controller. To turn off the controller when it is in wireless mode, press and hold the start button until the controller powers off.
For Wired Play with Envision Pro: Flip the switch on the back of Envision Pro to wired mode. Insert the included USB-C cable into both Envision and your computer.
Please note that Envision Pro cannot be paired with the Voyager Slipstream module.

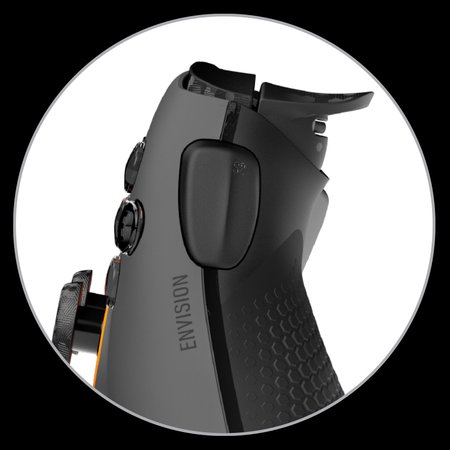
Remappable Paddles
Remappable paddles allow you to keep your thumbs on the sticks and engage fingers that are usually passive. It may take some time to get used to, but it will shorten your response times and provide you with game-changing milliseconds. Envision’s inner paddles are removable if you only need two paddles. The paddles are easily removable if you don’t want to use all 4.
Your controller comes with three pre-set paddle profile configurations to get you started. Simply press the Profile Button on the front of the controller to select the one you want.
Please note if iCUE is running, mappings in the software will be prioritized over the out of the box mappings listed below. To use the out of the box mappings, quit iCUE.

Paddle Configuration


- First press the Profile Button until you see the color profile you want to change.
- Next, press the Profile Button again, but continue to hold it until the light starts to blink.
- Now you can remap any paddle by simultaneously pressing the paddle and the button you would like to remap it to. After a successful pair, the RGB Lighting Strip will turn white and the controller will vibrate.
- To save your remapped configuration, simply press the Profile Button. The Profile Indicator light will stop blinking.
Please note:
- The inside paddles can be removed by using the provided removal tool.
- The SAX buttons and Paddles can be mapped to your choice of RB/LB, RT/LT, R3/L3, the entire D-Pad or any of the four Action Buttons.
- To reset the controller, press the reset button using a long thin object such as a paper clip. Please note that the reset button will recover the controller in the event the controller becomes stuck. The reset button will not reset profiles.
For all our game specific recommended layouts, please visit: scufgaming.com/gaming
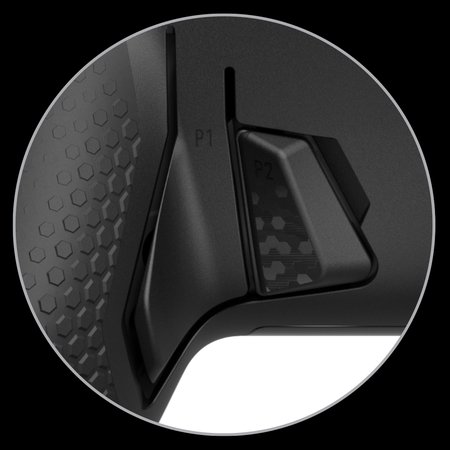
Remappable Side Action Buttons (SAX)
Envision features two side-action buttons, one on each side of the controller. Just in case you do not want to use the SAX buttons, we have made them removable and have included blank out pieces to make sure your controller still looks and feels great. To remove the SAX buttons, simply remove the faceplate and replace the SAX buttons with the included blank out pieces, then replace the faceplate. We think you’ll love the extra buttons, though.
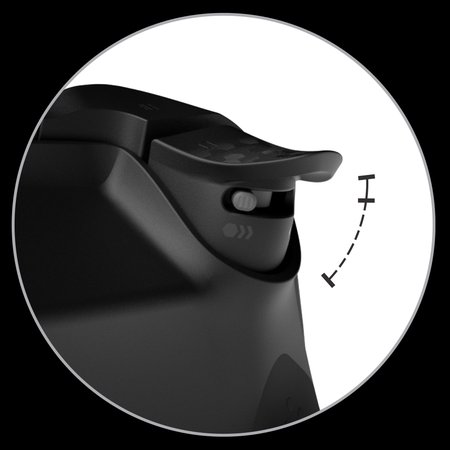
Triggers
Your Envision comes with standard triggers. Your Envision Pro, on the other hand, comes with a two-way trigger stop, giving you your choice of standard or digital triggers. Use instant triggers that activate like a mouse click for the fastest of shots. Prefer a longer pull for those days at the track? No problem, flip the switch the other way for the full range of motion in your triggers.
G Keys
G KEYS: Compatible with any iCUE supported device or function, the G Keys on Envision give you a new level of control. Fully synchronize your RGB lighting, or dive into even more advanced setups. You’re in total control.
The default G Key functions are below.
- G1: Mute Mic
- G2: Volume Down
- G3: Volume Up
- G4: Mute Audio Output
- G5: Eco Mode (turns off RGB Lighting Strip to save power)

Customization
ONBOARD CUSTOMIZATION: Want to swap your thumbsticks? Change your D-Pad? Change up your faceplate? Simply remove your faceplate by gently pulling it from the top, near the USB-C port and pull away. Make your changes. Reverse the motion to replace. Game on.
Keep your look fresh with a new Faceplate, Thumbsticks and Anti-Friction Rings — there are endless combinations available at scufgaming.com.
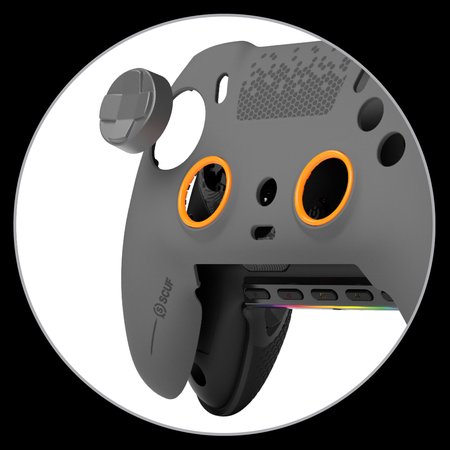
Interchangeable Thumbsticks
INTERCHANGEABLE THUMBSTICKS: First things first, what are you playing?
For first person shooters, we recommend using your tall thumbstick on the right for precision and accuracy through the scope. Short concaved on the left to dig in for quick, responsive moves. For sports games, stick with your concave sticks, they’ll give you the right balance.
Want to do your own thing? We get it. Remove your faceplate trim and simply pull the thumbsticks away from the shaft. Slide the new one on just as easily. To remove your Anti-Friction Rings, simply push them out from behind the faceplate trim and reverse the motion to reinstall.

Support and Limited Warranty
This product is covered by a 1 year Limited Warranty.
The date your warranty commences depends on your location and place of purchase. For SCUF Gaming Limited Warranty information, please visit scufgaming.com/limited-warranty.
For technical assistance, questions about your product or warranty, please visit scufgaming.com/support.
Contact: scufgaming.com/contact.
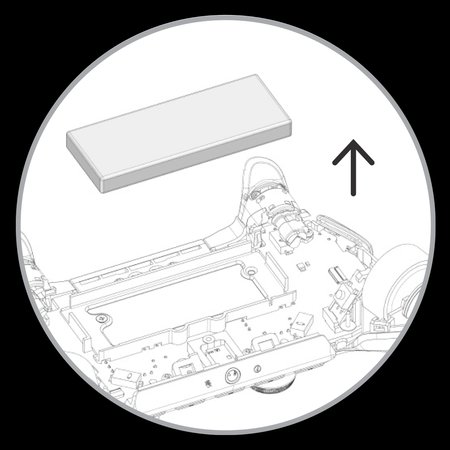
Battery removal information
This product uses a rechargeable battery and safety guidelines must be followed in the event that the product is disabled for disposal and recycling. To safely remove the battery for disposal and recycling, follow the numbered steps with the below diagrams.
SCUF Gaming encourages customers to recycle used electronic hardware and rechargeable batteries in accordance with local laws and regulations.


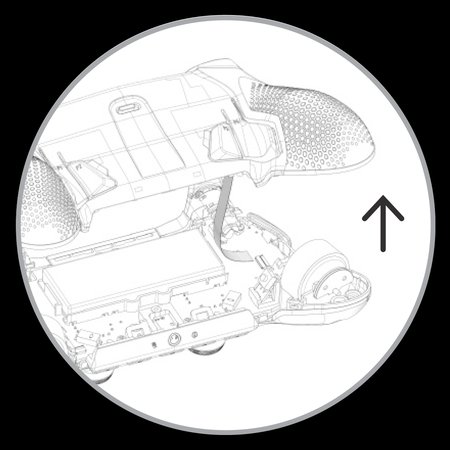
Paddle Removal


iCue x Envision
FIRST TIME USING iCUE?
If this is your first time using iCUE, please note that iCUE will detect all iCUE compatible devices, including Envision. You will be prompted to download and update to the latest firmware on any of your eligible devices, including Envision.
GETTING STARTED WITH ICUE + ENVISION
To begin configuring your controller with iCUE, plug in your controller to your PC via the provided USB-C cable. If you are using an Envision Pro model, please ensure that the switch on the back of the controller is set to USB mode.


After launching iCUE, you will be presented with a home screen.
The home screen shows all of your iCUE compatible devices.
Select the SCUF Envision module to begin configuring your controller.
Within the Envision module, there are sections that allow you to configure the settings of your controller.
Please note that when first ever using Envision, iCUE settings will not populate the controller until you click into each settings section.
MAPPINGS

The mappings section represents the mappings of the controller while iCUE is running.
There is a list of preset mappings that you can choose from to use or reference from when creating custom mappings.
Please note that the preset mappings, in iCUE, will differ from the out-of-the-box starter mappings that come pre-loaded on your controller.
- To create a custom mapping, select the “Custom” tab.
- Press the yellow “+” button to open up the “Mapping Type” menu.
- Select the mapping type you want to use.
- Select the button that you want to change.
- Select the function you want to map to your selected button.

Ensure that the controller image reflects the mapping you want.
Now you have successfully remapped your function to another button.
iCUE allows you to remap and change virtually any button or trigger on your controller within the mappings section. The controller images show what functions can be changed and are highlighted in yellow and light gray. Buttons highlighted in yellow do not have a default function. Buttons highlighted in light gray have a default function that you can overwrite by remapping them.
Please note that you cannot change the “A” and “B” buttons unless the “A” and “B” functions are mapped somewhere else on the controller. The “A” and “B” functions are critical to the majority of games for selecting or going back within menus. As a safety precaution, we have locked those buttons until you remap those functions to another button.
HARDWARE MAPPINGS & SAVING PROFILES TO YOUR CONTROLLER

Hardware Mappings represent the mappings of the controller when iCUE is not running.
Please note the controller must be connected to PC via USB-C cable and in wired mode to edit onboard profiles and save profiles to the controller.
Just like the mappings section, there is a list of preset mappings that you can choose from to use or reference from when creating custom mappings.
Please note that the preset mappings, in iCUE, will differ from the out- of-the-box starter mappings that come pre-loaded on your controller.
To create a custom hardware mapping, please follow the same steps found in the mappings section.
Please note that unlike the “Mappings” section, you are limited to what buttons can be remapped and what functions are remappable. Only the Paddles and SAX buttons can be configured within the Hardware Mappings section and all non-controller functions such as macros, launching applications, etc., are not available to be mapped. All configurable buttons are highlighted in yellow.
Be sure to save your hardware mappings to one of the on-board profiles on your controller so that you can use your favorite layout without iCUE running.

To save your profile to your controller:
- Select the drop down menu.
- Choose the profile you want to save to your controller.
- Select Device Settings.
- Press the three dots next to the Slot # you want to save your profile to and select “Overwrite.”
Now your profile has been saved to your controller.
Please note that Lighting Effects settings will not be saved and applied to the controller when iCUE is not running (settings such as response curves, deadzones, mappings, etc. will be saved).
Below is a reference table to show what “Slot #” is associated with what profile color.
|
Slot Number |
Profile Color |
| Slot #1 | Blue |
| Slot #2 | Red |
| Slot #3 | Green |
LIGHTING EFFECTS

The lighting effects section allows you to customize your LEDs on your G-Key panel and LED Bar.
You can configure the LEDs by changing them to a different preset or creating your own lighting effect.
To configure your LEDs, select the active effect in the “Lighting Layers” column or the “+” button to create something new.
You will now see all of the options you can change.
Please note that iCUE must be running for your controller to display your desired lighting effects.
TRIGGERS
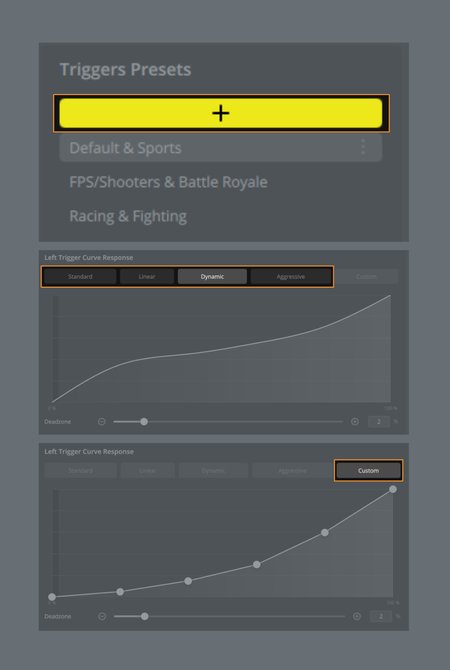
The triggers section allows you to configure how your trigger behaves when pressing it. You can use the available presets or create your own preset to configure them.
To create your own preset press the “+” button.
Next, choose a preset “curve response” for the desired trigger you want to configure.
You can also create your own curve response but selecting the “Custom” tab.
You can fine tune your curve response by clicking and dragging the white dots to your preference.
Please note that the X axis represents how much the trigger is pressed and the Y axis represents the activation value of the trigger. You can tune the values of the trigger at 20%, 40%, 60%, 80%, and 100% trigger depression.
You are also able to tune the deadzones of the trigger. To do this, adjust the deadzone slider, located at the bottom of the graph, for the desired trigger.

Please note that adjusting your deadzones below 2% may cause unintended trigger movement in-game or within menus. Having a large deadzone will mean that you have to press the trigger much more before a game recognizes the trigger movement.
THUMBSTICKS

The thumbsticks section allows you to configure how your thumbsticks behave when exercising it. You can use the available presets or create your own preset to configure them.
To create your own preset press the “+” button.
Next, choose a preset “curve response” for the desired thumbstick you want to configure.
You can also create your own curve response but selecting the “Custom” tab.
You can fine tune your curve response by clicking and dragging the white dots to your preference.
Please note that the X axis represents how much the thumbstick is moved and the Y axis represents the registered value of the thumbstick. You can tune the values of the thumbstick at 20%, 40%, 60%, 80%, and 100% thumbstick movement.
You are also able to tune the deadzones of the thumbsticks. To do this, adjust the deadzone slider, located at the bottom of the graph, for the desired thumbstick.

Please note that adjusting your deadzones below 2% may cause unintended thumbstick movement in-game or within menus. Having a large deadzone will mean that you have to move the thumbstick much more before a game recognizes the movement.
VIBRATION

The vibration section allows you to set your vibration intensity.
You can use the available presets or create your own preset.
To create your own preset press the “+” button.
Next, use the sliders to set your desired vibration intensity.
Please note that both the left and right sliders will mirror each other when the “Sync” button is on
DEVICE SETTINGS

The device settings section allows you to check for updates, check battery status, adjust brightness, and toggle on or off settings such as:
- Sleep Mode
- Eco Mode
- Show Battery Gauge in Notification area
Additionally, this section allows you to pair your wireless receiver should you ever need to re-pair it and view, set, or reset your on-board memory profiles
USING SAVED PROFILES OR OUT OF THE BOX CONTROLLER SETTINGS

As a reminder, you can save your favorite profiles to one of the three available on-board memory slots to your controller. Additionally, almost all settings within each section (other than lighting effects and non-standard controller functions) that you apply to your profiles are saved with your profile to your controller.
To use your profiles that you saved to your controller, or if you just wanted to use the out of the box controller settings and mappings, you will need to quit iCUE completely.
To quit iCUE, bring up your hidden icons. This is usually located near the right side of your taskbar (bottom right of your entire screen).
Click the “^” (up arrow) and locate the iCUE icon
Right click the iCUE icon and select “Quit”
Now you have completely quit out of iCUE.
Please note that just closing the iCUE window, or closing it from your taskbar, does not quit the program as it will still be running in the background.
FOR MORE INFORMATION ON ADVANCED CONFIGURATION WITH ENVISION AND ICUE, PLEASE VISIT SCUFGAMING.COM